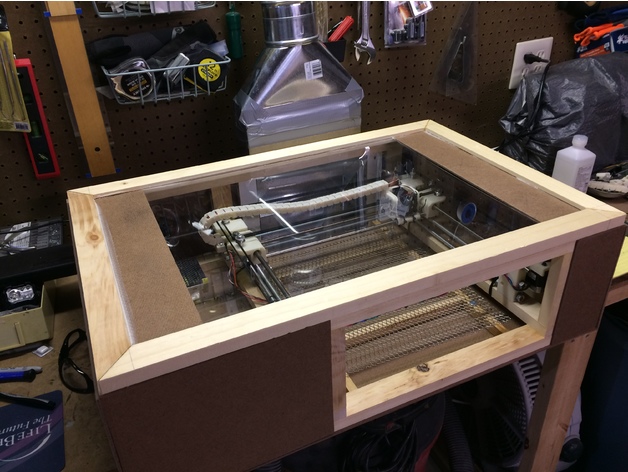
Jon aka. Dr3vil used a parts form old Prusa Mendel and made a close chamber DIY laser cutter / engraver. He documented his project on Thingiverse.
Jon writes:
For files and instructions go to:
http://www.thingiverse.com/thing:2120327
Keep in mind that it is a work in progress...
Jon writes:
I wanted to add a laser cutter/engraver to my shop and decided it would make a good design challenge based on recycling a Prusa Mendel - Essentially a frame of 5/16” threaded rod and 8mm rod with LMU88 bearings. The CAD models had to be simple to print, make what you can, buy what you absolutely must, and source locally. Ultimately this project is a primer for building gen III of my 3D printer and a larger gen II laser of many watts. As such I’m sharing an ‘as-is’ , ‘it got me to operational’ dump of the project STL’s, sanding and part prep will be required.
Firmware is Marlin configured for CoreXY. It was helpful to set a dummy thermistor value as this allows using the print bead and hot-end outputs as switches from gcode (M104 S100 and M140 S100, send S0 to turn off). The fans and laser power supply are switched, as usual fan PWM modulates the laser through M106.
Gcode generation is either by Jtech Inkscape plugin or 305 Engineering’s raster generator. For engraving PCB’s I ended up modifying 305’s code, borrowing a page from Jtech. The first change was having laser off moves run at full speed, since acceleration is handled in firmware this shaves a lot of time off the job. The second change was to have a pause when turing the laser on or off as to allow the edges of the burn to be more defined, 200ms was enough. Finally adding pre and post geode safe the machine when done and get in position.
For files and instructions go to:
http://www.thingiverse.com/thing:2120327
Keep in mind that it is a work in progress...


