Twist Table

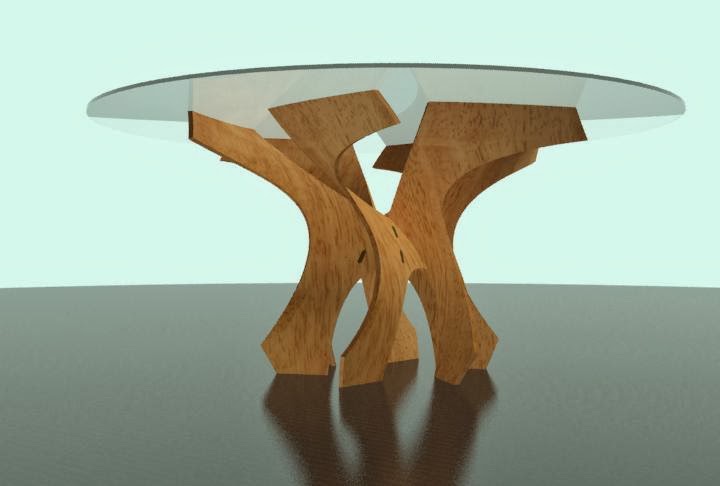
This was a project I did in conjunction with Al Pierce at Taubman College. It's a dining table made from laminated bending plywood. Here's the computer rendering:


Design / Joinery

This project uses six identical pieces in radial symmetry. The surface is double-curvature, although it is meant to be “gentle” (read semi-sorta-kinda-maybe-sane).

The materials are bending plywood, white oak veneer and glass.

The parts are held together with through-mortise and tenon joints. The edges which mate are compound curves. The tenon and its corresponding mortise are curved as well as tapered. This joinery would be very difficult to fabricate without the use of CNC tools.


The goal was to try to use a single fixture to support all operations – laminating, trimming, and mortising.

Materials / Layout

Fixture: (2) 4’x8’x3/4” Standard MDF
Core: (3) 4’x8’x1/8” Bending Birch Plywood (Column)
Veneer: (3) Flexwood Wood-On-Wood, White Oak, Plain-sawn
Adhesive: Polyurethane Glue


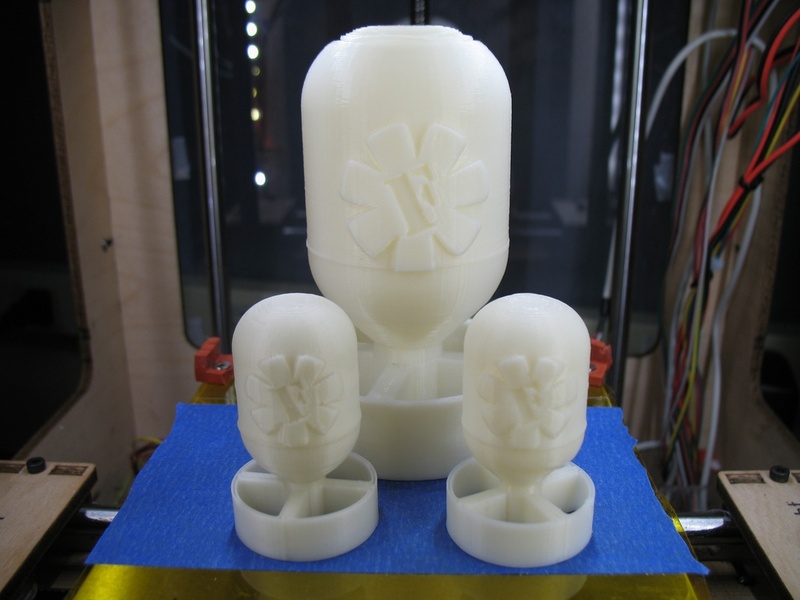
The fixture was 3-axis routed from MDF, glued-up with Titebond, then 5-axis routed to smooth the form and cut the gasket and vacuum grid.Here are some progress pictures:

The parts having been cut on the 3-axis: 

Al Pierce applying glue and aligning each piece with dowels:

Done laminating the pieces... over the 5-axis router...

Smoothing the top of the form: 

The finished fixture with the vacuum grid cut into the surface: 

Testing / Dry Bending / Vacuum Forming

The first test we tried was vacuum forming a dry piece over the form. The Smash command was used to flatten the double-curved surface to a plane. Readers - don't ever use the Smash command! Worthless piece of shit. I should have know better...

 Here's the dry piece over the form ready to test with vacuum pressure:

 The piece cracked in two places, but mostly on the inside corner. Gaussian curvature analysis shows that this area has negative curvature – it is most highly saddle shaped in that region.


We wet a single piece of bending plywood for 5 minutes then vacuum formed it alone on the fixture. It bent without cracking.


We then attempted three sheets of plywood and two layers of veneer. These were soaked in water for 30 minutes and glued with polyurethane glue.

 Results / Future Work

There was no cracking but lots of puckering in the veneer and quite a bit of spring back relative to the true surface of the form. 


The puckering may be partially related to the use of tape to hold everything together during the vacuuming (the glue isn’t tacky and the parts want to slip relative to one another. 
We could possibly eliminate the tape by securing the work on the form in some other fashion (dowel pins perhaps). Then again may be not… The spring back could possibly be eliminated by using epoxy as the adhesive although the wet material may be an issue. 

The best approach is to change materials. There is a board which bends without spring back when heat is applied.


3d printing with metal

Metal 3d printing. Looks complicated (even if its not). Heavy machinery, multiple stage process, models are fragile at early stage. Still, I can imagine it is much harder to get metal object with complex aesthetics using "regular" methods of metal work.

New RepRap print quality advancement

New advancement in RepRap print quality (with non-standard nozzle).

http://blog.reprap.org/2011/11/quality-open-source-for-win-part-deux.html

Quality - Open Source for the Win (Part Deux)


A short while ago Neil posted here about the way RepRap 3D print quality is starting to knock spots off the proprietary competition.

Well.  This blog is not the place for RepRap spinoff company Ra Ra, so I have left it until our sales campaign here is just about over before making this post.  (And no - I couldn't manage to resist abusing my position and including the link.)

Jean-Marc just printed Misguided's Screw Cup from Thingiverse (above) on one of our RepRapPro Huxleys in ABS.  We used a non-standard 0.3mm nozzle  (standard is 0.5mm) and a layer height of 0.1mm.  It took a while under those conditions, of course - 5 hours.

But check out this surface finish under the microscope:


The line is a 60-micron human hair (selflessly donated by Christine Bowyer under only mild protest; as those aware of my appearance will know, I am incapable of providing such a sample myself).

We think that the quality we're getting is rather good...

3d printed car parts by Objet

Video of Objet presentation models. There are printed on industral scale 3d printers, but still the technology is fascinating.
Video shows regular size fully functioning car dashboard printed, glued and painted. The joints on it are moving and everything looks very solid and detailed. After it, the functioning 3d printed car part is shown followed by some 3d prited industrial molds and skateboard. In the end there is working 3d printed hand drill.
First thing that came to my mind after watching it was how much I paid for some replacement plastic parts for my 2001 A-class. Few broken small handles and plating for seat adjustment. Too much I can tell you, not to mention I waited for them two weeks. I have a feeling that it would be much cheaper if technology was wider spread since the resolution needed to print those parts I needed is achievable by today's diy 3d printers.

It is taken on EuroMold with Jonathan Jaglom Objet VP of Sales Operations.

Printrbot - new player on diy 3d printing scene

It seems that there is new diy 3d printing project emerging: Printrbot by Brook Drumm.

Main advantages:
  • 45 minute assembly time
  • less than 2 hours from starting the build to first print
  • price under $500, electronics and motors included
  • uses derivative of Wade's extruder
  • Sanguinololu electronics
  • most of the supporting structure printed
Great development, it's good to see new improvements, diversity and evolution.

Printrbot in action:


Printrbot Calibration Test Prints pt05 from Printr Bot on Vimeo.


Printrbot-Mystery-Print from Printr Bot on Vimeo.

3d printed toy dart gun

I'v posted some 3d printed  model weapon parts and model guns, but this is working toy foam dart and rubber band pistol.
Video shows how to assemble it and how it works. Kudos to the author!


Thingiverse link:
http://www.thingiverse.com/thing:7512

3d printed aircraft from University of Southampton

Engineers at the University of Southampton have designed and flown the first 3d printed aircraft. Nice project!
It was printed on EOS EOSINT P730 industrial 3d printer. Hopefully someone will create something similar for DIY crowd.

Here are some videos:


Update:

SULSA drone is now launched from the Royal Navy battleship:


3d plant seed bomb

I have seen this design several times but never took more detailed look. The idea behind it is great: fill the bomb with plant seeds and drop it on soil somewhere. Since the case is 3d printed in water solvable and bio degradable PVA plastic, the outer shell will dissolve and plants will begin to grow. It is F-bomb by tbuser.


On Thingiverse:
http://www.thingiverse.com/thing:12812

Filckr photo gallery:
http://www.flickr.com/photos/tbuser/6266697931/in/set-72157627984607320/

Other seed bombs:
http://www.guerrillagardening.org/ggseedbombs.html

Printing working model multitool on industrial 3d printer

I am fan of multitools. Many functions in one package. Transformers of tool world.
This is a video of functioning multitool model with moving components being printed on industial 3d printer. I can see that material innovations will drive 3d printing technology and vice versa. I hope to see similar 3d print quality on diy or home 3d printers in 2-3 years. Or maybe sooner?

DIY 3d milling of magnetic fields